View Single Post in: TIPTORIAL: Extracting UV Maps for Better Recolors (2009 update)
#3
 18th Jan 2009 at 11:03 PM
18th Jan 2009 at 11:03 PM
To get the UV map for some piece of clothing, we first need the 3d model from the clothing mesh. The way you get the mesh differs for Maxis clothing and custom clothing, so please read the appropriate section. This post covers Maxis mesh extraction, the next one covers custom mesh extraction.
Exporting the Mesh - Maxis
This section's text and images by HystericalParoxysm
----------------------------------------------------------------------
Though most Maxis meshes have fairly intuitive mapping, if you're doing something tricky, it can be nice to be able to apply the UV map to the mesh and preview it in Body Shop, and/or overlay it as a multiple layer over your texture in Photoshop to see exactly what's going on.
If you're recolouring a Maxis mesh, check this thread to see if someone's already exported the UV map. May save you some time so you don't have to bother.
The way you'll find the 3d model to export differs if you're doing a Maxis mesh or a custom mesh.
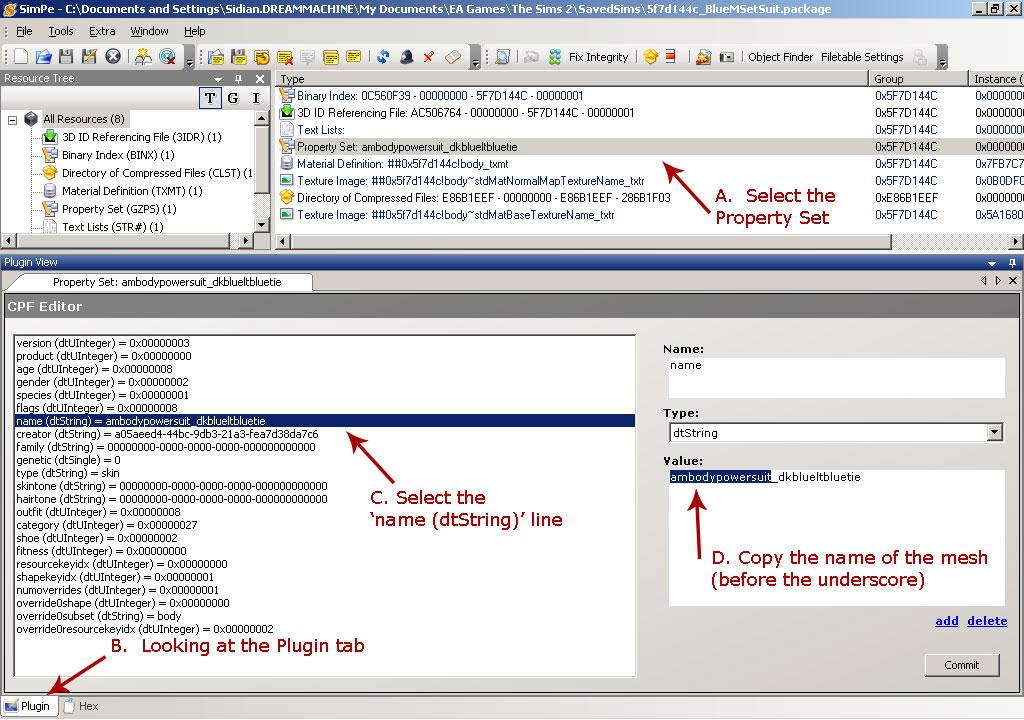
To export the 3d model for a Maxis mesh, start by opening a recolour of that mesh in SimPE to find the name of the mesh it's recolouring.
A. Select the Property Set.
B. Look under the Plugin tab. You may have more or less tabs at the bottom of your SimPE than shown. If you don't have a Plugin tab there for some reason, you can bring it up through Window - Plugin View.
C. Select the line that starts with 'name (dtString)'
D. To the right, under Value, will be the name of the mesh for that recolour. Select and copy the name. Don't include the underscore or anything after it.
click to enlarge
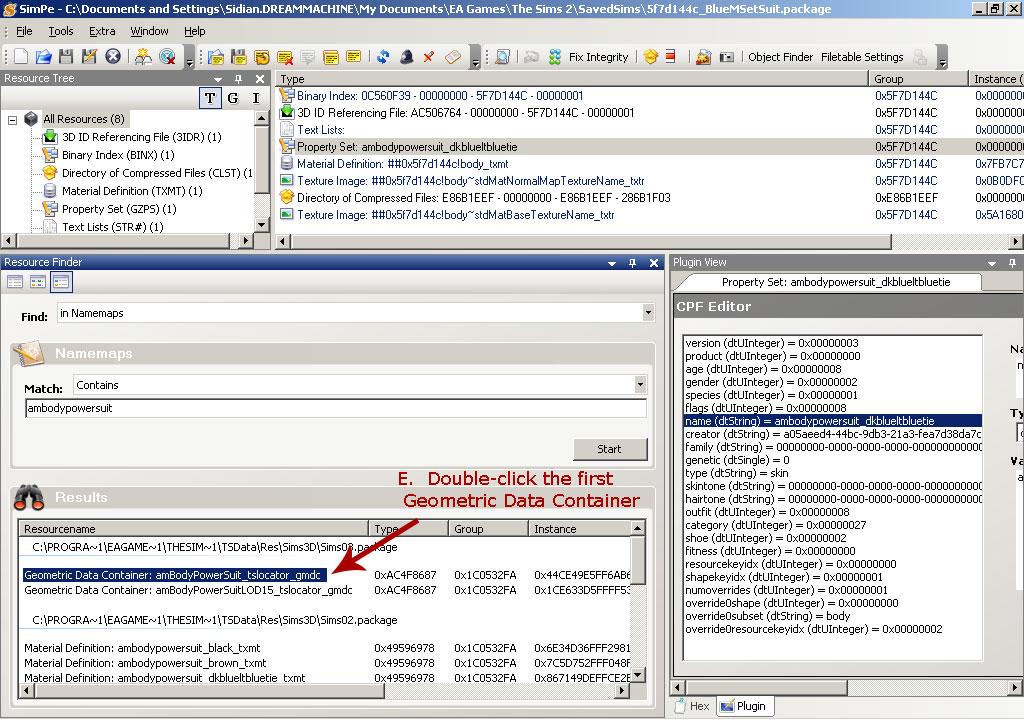
Now we need to locate the package file that holds the actual 3d model with that name.
Window - Resource Finder will bring up another docker that will allow you to search for models with that name. "In Namemaps" should already be selected for Find: and Match: should be already set to "Contains". Paste the name of the mesh we're looking for in the box below and click Start.
It will take a few moments to search for a mesh with that name, and the search bar may run multiple times.
E. In the results, look under the list of resource names, and double-click the first Geometric Data container. Make sure you double-click the first one, not the one that includes 'LOD15' in the name.
If you need more room to see the names, you can always drag out the Resource Finder docker a little bit as shown.
click to enlarge
.
.
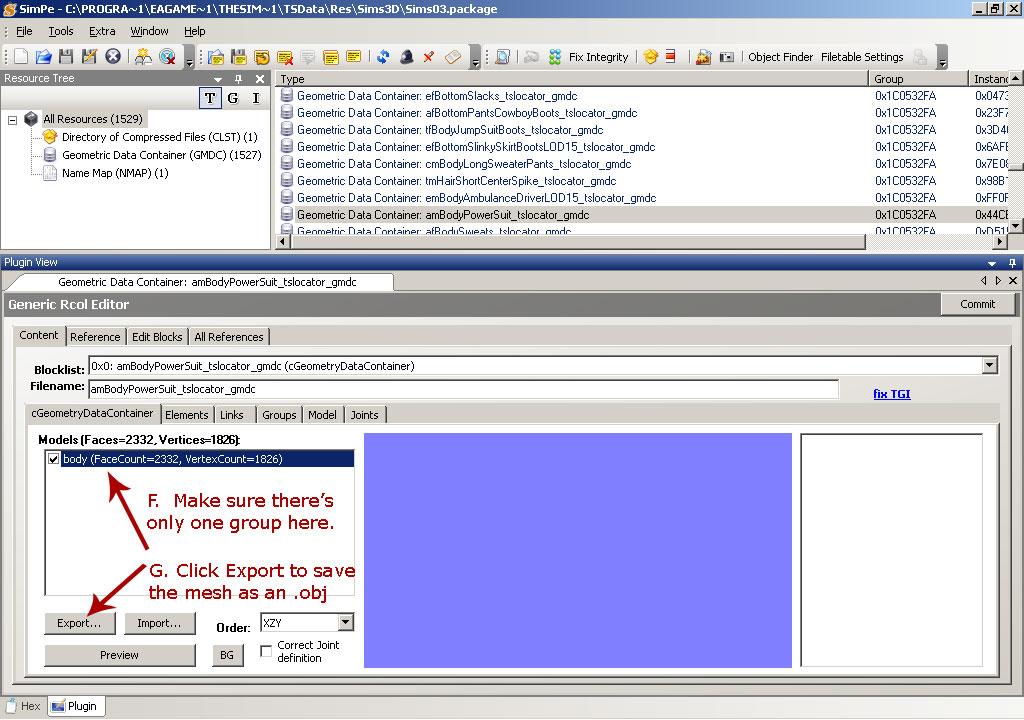
SimPE will open the package file containing the 3d model for the mesh. The package files that hold the game's 3d models are very large files, containing many models, so it may take quite a while for it to open the file, and for SimPE to start responding again.
You can now close the Resource Finder by Xing the upper right corner on its docker. You can see the long list of 1500 geometric data containers (GMDCs) listed in the Sims03.package file now open, and we've got the particular GMDC we're looking for already selected.
F. Again, under the Plugin view, look under where it says Models. There should be only one item listed; this technique will only work properly if there is only one, but most body meshes only have one. You can still try it if the mesh has multiple groups, but the results are often not very useful (confusing overlapping, etc.)
G. Click Export to save your mesh as an .obj file. The name and where you save it don't matter much - put it somewhere you can find it easily, and name it something that makes sense to you. You can leave it the default filename if you want.
click to enlarge
.